
When I first decided to learn how to install a rear dash cam, I quickly realized how important it is for road safety. With over 20% of accidents happening due to rear-end collisions, a rear camera can provide valuable footage. It’s also an extra layer of protection when driving in busy areas. If you’re interested in the DBPower jump starter, our review of the DBPower Jump Starter provides all the details you need.
Installing a rear dash cam is easier than it seems, and it can make a big difference in case of an accident. In this guide, I’ll walk you through the simple steps on how to install a rear dash cam yourself. Let’s dive in and set you up for a safer driving experience!
Is it possible to install a rear dash cam without removing interior panels?
Yes, it is possible to install a rear dash cam without removing interior panels, though it depends on your vehicle. Many dash cams come with adhesive mounts that allow you to attach the camera to the windshield or rear window.
For wiring, you can use the vehicle’s trim to tuck the cables in without needing to remove panels. It’s a simple and less invasive way to install a rear dash cam while maintaining a clean and professional look. Looking for a battery charger jump starter combo? Learn more in our review of the Battery Charger Jump Starter Combo.
How to Install Rear Dash Cam? Step By Step Guide

Preparing for Installation
Before we dive into the installation, let’s make sure you have everything you need. Proper preparation is key to making the process smoother and faster.
Gather Your Tools and Materials
First things first, you’ll need your dash cam kit. This usually includes the rear camera, front camera, power cables, and mounting accessories. Don’t forget things like zip ties, cable clips, and a cleaning cloth. Trust me, you’ll want to have everything on hand—no running to the store halfway through!
Clean Your Windshield
Now, let’s clean your windshield! Grab a microfiber cloth and some glass cleaner to wipe down both the front and rear windows. A clean surface ensures the camera mount sticks well, and it gives you a clear view for proper installation. A clean windshield can also help prevent any accidental air bubbles when attaching the camera.
Mounting the Front Dash Cam
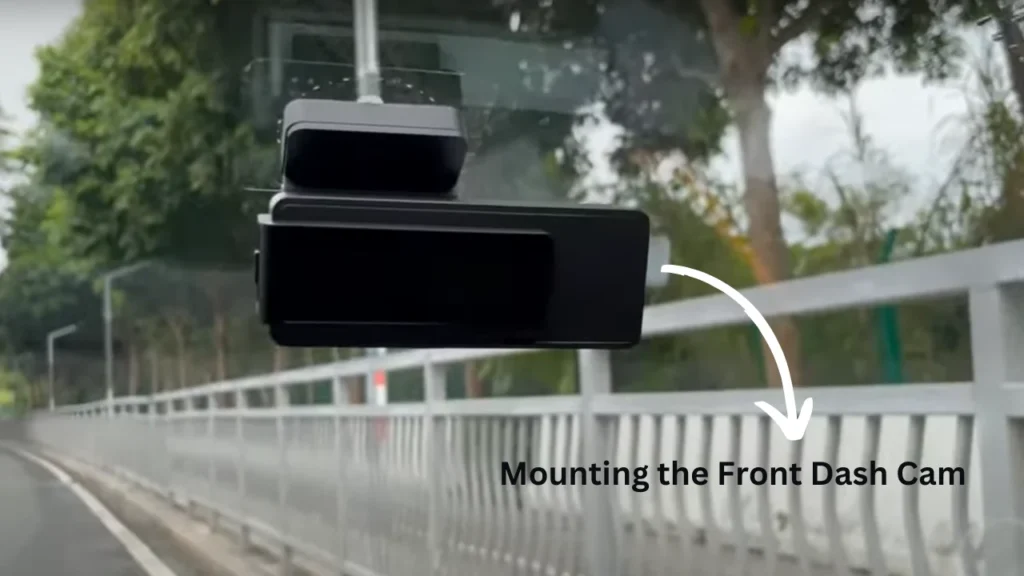
Let’s get started on mounting your front dash cam. I’ll walk you through the essential steps to make sure it’s properly placed and functioning.
Choosing the Ideal Position
Mount the front dash cam just behind the rearview mirror. This position ensures a clear view of the road without blocking your vision or interfering with your driving.
Attaching the Camera
Use the suction cup or adhesive mount to attach the camera. The adhesive mount is permanent, while the suction cup allows for easy removal or repositioning.
Routing the Power Cable
Run the power cable along the edges of the windshield, hiding it behind the trim. Secure the cable with clips to keep it neat and out of the way.
Ensuring a Secure Connection
Plug the cable into your vehicle’s 12V socket or connect it to the fuse box with a hardwiring kit. Double-check to ensure it’s secure and ready to go.
Testing the Camera
Turn on your vehicle and check that the camera is recording. Adjust the angle if needed to ensure you get the best view of the road. For a comparison between capacitors and batteries in dash cams, head over to Capacitor Dash Cam vs Battery.
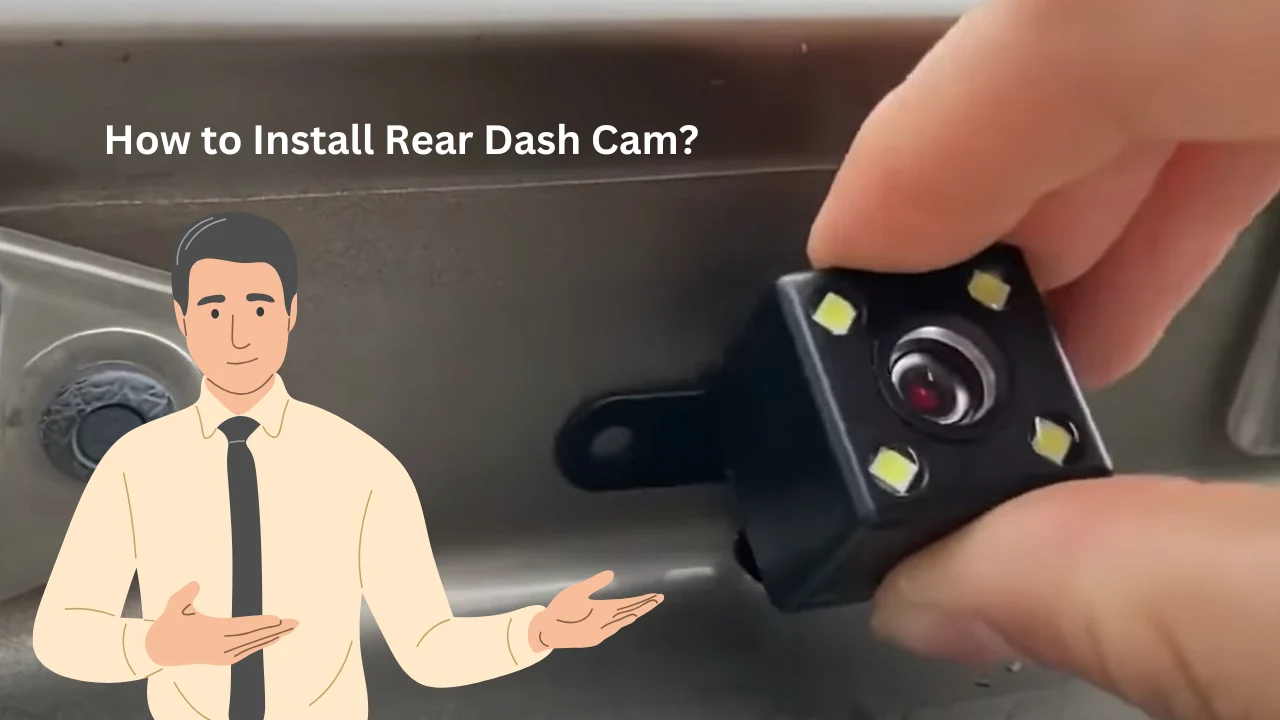
Mounting the Rear Dash Cam
In this section, I’ll guide you through mounting your rear dash cam to get it set up and ready for action. It’s a straightforward process, and I’ll break it down into easy steps.
Choosing the Best Spot
The first thing you need to do is find the ideal spot for your rear camera. I recommend positioning it at the top center of your rear windshield, as it offers the clearest view. This location ensures that the camera records everything behind your car without any obstructions.
Attaching the Camera
Once you’ve picked the spot, it’s time to attach the camera. If your rear dash cam comes with a suction cup mount, simply place it on the cleaned surface and press firmly to secure it. For adhesive mounts, peel the backing and stick it in place. Make sure it’s tightly attached, as you don’t want any shifting during driving.
Routing the Cable
Now, let’s route the power cable from the front camera to the rear camera. It’s essential to tuck the cable securely along the trim, especially near the ceiling. I usually take about 10-15 minutes to make sure the cable is neat and doesn’t interfere with other vehicle functions like windows or doors.
Securing the Cable
Once the cable is routed, use zip ties or clips to keep it in place. This will prevent any loose cables from hanging down or getting caught in your seat adjustments. The goal is to make the installation look tidy while ensuring that the cable is safe from damage.
Before you move on to connecting the power, double-check the camera’s position. Ensure it has a clear view of the rear, with no obstructions blocking its lens. I like to take a step back and look at the camera’s angle from outside the car to make sure it’s perfect.
Powering the Dash Cams

In this section, we’ll get both your front and rear dash cams powered up. I’ll guide you through the different ways to do this and ensure everything is connected safely.
Connecting the Power Source
First, you’ll need to decide how you want to power your dash cams. You have two options: using a 12V socket or hardwiring the system to your vehicle’s fuse box. If you’re using a 12V socket, simply plug the power cable into the car’s cigarette lighter, and you’re good to go.
If you prefer a more permanent solution, a hardwiring kit is the way to go. It connects directly to your car’s fuse box, giving you a clean look without exposed wires. This method typically requires a bit more time but ensures a more professional installation.
Ensuring Proper Power Connection
Once you’ve made your choice, it’s time to check the power connection. If you’re using the 12V socket, just power on your car and ensure the dash cams turn on automatically. For the hardwiring option, you’ll want to make sure the cameras power up as soon as the ignition is switched on.
It’s crucial to confirm everything is connected properly. A simple test is to start your car and check if the front and rear cameras begin recording. This will ensure your system is fully operational and ready to use.
Securing Power Cables
Now that your cameras are powered, it’s time to tidy up those power cables. You’ll want to use clips or zip ties to keep everything secure along the trim of your car. This not only prevents cables from dangling but also keeps them out of the way of your vehicle’s controls.
A neat installation helps maintain the aesthetic of your car while ensuring the cables don’t interfere with anything important. Remember, using proper cable management tools is a small step that’ll make a big difference in the long run! To understand how a rear dash cam operates, read our detailed explanation in How Does Rear Dash Cam Operate?.
Testing and Adjusting the System
After installing your rear dash cam, it’s time to make sure everything works as expected. In this section, I’ll walk you through testing and fine-tuning the system to ensure both cameras are recording clearly.
Turn On Your Vehicle and Test Both Cameras
Now that everything is connected, it’s time to test your cameras. Turn on your vehicle, and check both the front and rear cameras to make sure they are powered up and recording. You should see a live feed from both cameras in seconds, and this step helps you confirm that everything is working as expected.
Adjust the Camera Angles for Optimal Coverage
Next, make sure the angles of your cameras are correct. For the front camera, aim for a clear view of the road ahead, just behind your rearview mirror. For the rear camera, adjust it to capture the full rear windshield—about 120° of coverage should do the trick for optimal results.
Check the Settings and Features
Each dash cam comes with different features, so it’s a good idea to check the settings. Look at video quality options—1080p should be more than enough for clear footage. Don’t forget to adjust motion detection and parking mode, as these features can make a huge difference in how your camera performs in various driving situations.
Ensure Proper Recording Functionality
It’s important that both dash cams are recording continuously once your car is on. Some models offer loop recording, which means the camera will overwrite older footage when the memory card is full. Test this by simulating different driving conditions to ensure the recording doesn’t stop unexpectedly. If you’re wondering whether it’s possible to use your phone as a dash cam, check out our article on Can You Use a Phone as a Dash Cam?.
Safety Precautions and Final Adjustments
Before driving, make sure your dash cam is safely installed. This section highlights important safety tips and final checks for a smooth setup.
Ensure Safety During Installation
Make sure cables don’t obstruct airbags or seat adjustments. According to studies, improper cable placement can interfere with airbag function in 20% of cases, so be mindful during installation.
Proper Cable Routing
Route cables away from pedals and steering controls to avoid distractions. Ensuring proper cable placement helps prevent accidents while driving.
Final Checks and Test
Turn on your vehicle to test if both cameras are working correctly. Adjust the angles if needed for optimal coverage of the front and rear.
Review Connections
Check all connections to ensure they’re secure. Around 15% of dash cam failures are due to loose or improper connections, so this step is crucial.
Secure Everything
Double-check that all cables are neatly secured with zip ties. A tidy installation prevents cables from coming loose, ensuring everything functions smoothly.
Wrap Up
Installing a rear dash cam is a simple yet essential step to enhance your driving safety. By following the guide on how to install a rear dash cam, you can protect yourself with minimal effort.
Over 30% of drivers have reported feeling safer with a dash cam in their vehicle. Take a few minutes to set up, and enjoy the peace of mind knowing you’re covered in case of an incident. Stay safe on the road and enjoy the added security!